I’m a baby bloomer, that is a baby boomer who is a late bloomer! I got started in all of this mobile technology a little late and my kids have pressured me into creating a blog!
The thing I love most to do is making art, well I mostly like to brag about my great kids but people would get kinda tired of hearing about that. So I decided to share my art processes and maybe spur on someone’s hidden desire to create. I must be an artist geek because sometimes, I really hate to admit this but, I actually can lose sleep thinking of ideas and what I’m going to paint, print, or sculpt next. Sheer craziness I’m sure but I’m not about to cut off my ear like Van Gogh did! But I do respect the man for his prolific work and his love of nature and expression.
So here we go with the next step to a small but ‘will be impressive’ print project!
The next step in the printing process is to take your photocopied drawing and cut it to the size of your linoleum block or in this case I used something called ‘Soft-Kut, a material that can be carved with ease. It’s something like a rubber eraser. If you purchase the thicker ones that are available you can even carve a different design on the other side, two for the price of one! Mine was about 3/8″ thick. Any materials I mention can be purchased in an art store or of course in our ‘touch screen’ society……the Internet!
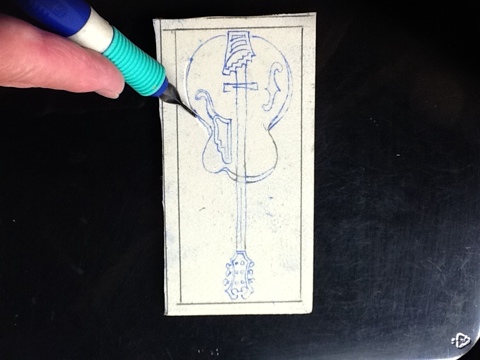
My block was about 5″ x 2 1/2″. I then take my photocopied drawing and place it on my block right side up. I sandwich a piece of transfer paper or graphite paper in between the block and my drawing. Now I can outline my drawing with a pen so I can see where I’ve traced. I peek to make sure the drawing is being transferred.
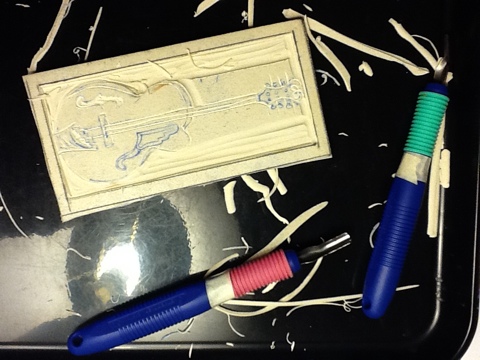
The fun part is carving the block. I take my time and carefully remove all areas that will not carry the ink. In the art world we call this positive and negative space. Use a linoleum cutter, also bought at the art store, and keeping the cutter fairly parallel to the block with your pointer finger on top, gently guide the cutter around your design, removing the areas that you don’t want ink on.
By the way, cutters have different sized blades for cutting away small to large areas. Make sure you use the right size. I have three different sizes for this purpose.
I use a tray underneath while I am carving so the stuff you carve off will be contained and not all over the floor.
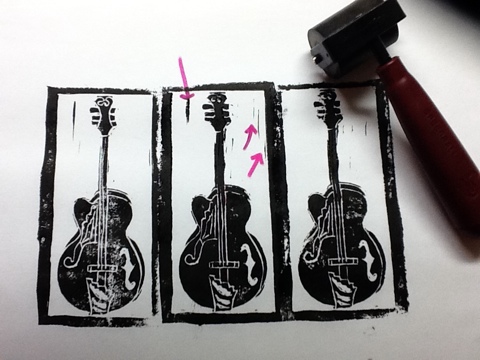
So the next step in this process is to make a ‘test print”. I usually use plain old washable markers for this so I don’t waste the printing ink. Mark up the entire block with marker and press your block (ink side facing your paper) onto some scrap paper. You can see exactly where you have to carve to tidy up your printing block. I marked my photo with pink arrows showing just where I have to carve some more.
So once you get this far you’ll know you’re almost done and can have some fun printing. You’ll need a brayer and a tube of water soluble printing ink in your choice of color for the next step which will be posted soon!


