As promised, I am posting a tutorial on the clay ornaments we made in my art club. These are relatively easy for kids and adults to make and can be taken to another level, depending on how involved you want to get in embellishing them. They certainly make lovely little gifts and even though these are Christmas themed, I can see these made for Valentines’s day and Easter as well. So here goes!
Making the dough: only three ingredients! Unheard of!

Mix all ingredients in a medium saucepan. Since these are ingredients that are used in everyday cooking, don’t be afraid to use a saucepan that you use everyday. It’s okay…..really! Washes out easily!
You have to constantly stir the mixture over medium heat until it looks like mashed potatoes…..honest! But don’t eat it!
Turn the dough onto the countertop and cover with a dampened paper towel. Allow to cool until you can safely handle it.
When cool, knead the dough and wrap in plastic if not using right away.

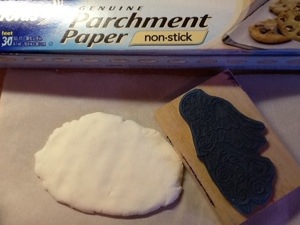
Okay……ready to play? Place a piece of parchment or waxed paper onto the counter and roll some of the clay dough out. You can use your hands to flatten it out but a rolling pin ensures a nice even surface.

Next step is to choose a nice stamp (simple lines work best) and load the desired stamp with archival ink, ( a water soluble ink might bleed into the dough).
Carefully press the inked stamp onto the clay dough and carefully pull away. It should leave a nice print.

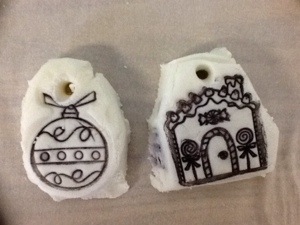
Next, neatly cut around the stamped area with a sharp instrument. Use a plastic knife when making these with children. If your edges come out a little rough, they can be smoothed by dampening your finger with a little water and running it around the edges. Don’t forget to make a hole for hanging at this point. A straw works well.

I found that you can also use different color ink stamps. On my finished angel, I used a pretty blue color!
Here’s my completed angel. I added tiny rhinestones to make it sparkle a little.

Allow the ornaments to air dry for a few days. Leave them on parchment or waxed paper and turn over each day. Embellishments can be added when the ornament is completely dry. It can also be painted with either acrylics or water color paint (using very little water). Children can ‘paint’ their ornaments with markers. I found it works just fine, To further preserve these ornaments, I’d suggest a spray of clear acrylic spray to seal everything. It’s optional though!

The above photo shows ornaments made by kids. They came out nice! Just need to dry first before painting.
And if you have a little bit of clay left over, you can make a little clay angel like this one! I couldn’t resist making her! She’s about 2″ long. I formed a little body, head, arms and legs. As she dried, the pieces didn’t stick together, so when everything was completely dry, I used ‘Tacky’ glue to put her back together. I also made a little hole on her head which is hidden by her hair! I actually used watercolor to paint her and it was fine. Just remember to keep it on the dry side. I think she’s a little cutie! What do you think?

I’m sure you’ll love this easy homemade clay as much as I do. I’ve only had positive results with it so far and it’s safe for kids. It dries beautifully too into a nice hard finish, almost like porcelain. Try it out sometime!


I absolutely love the angels…I need to make a few for some friends going through tough times..can I borrow that beautiful stained glass angel stamp?
Of course you can!
Sent from my iPad
>